Search This Blog

Thursday, October 25, 2012

Try the Format Painter!

Have you ever wished there was a quick way to have the same formatting in multiple locations in a Word document, a PowerPoint presentation, or in multiple cells in Excel without having to select all those options again? One of my favorite tools is the Format Painter - that little paint brush you see included with the Clipboard tools on the Home tab of the ribbon. It’s such a useful item it even appears on the mini toolbar - that’s the toolbar that shows up when you right click a selection.


For example, you have formatted a paragraph heading with bold, italics, 12 point Comic Sans, in a lovely custom shade of blue, and maybe even added a shadow! Now you are adding another paragraph heading, and would like to re-use all those attributes. It’s easy with the format painter!

This is the formatting I want to use elsewhere:  
  
1.  Select an example of text that has the attributes you would like to use elsewhere: to copy just text formatting, select some text; to copy paragraph formatting (line spacing, indents, etc.),  select the entire paragraph; in Excel select a cell.
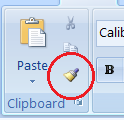
2.  Click the Format Painter and your mouse will now have a paintbrush attached. If you need to copy the format to multiple locations in the document, double click the paintbrush tool. It will stay active until you click it back off or use the Escape key (ESC) on your keyboard.
Format Painter tool


3.  Click and drag over as much text as you need to format. The formatting will be copied!

Formatting copied to other text in the document

Friday, May 25, 2012

Do the splits!


Sometimes it is convenient to be able to view the beginning of a document as well as the middle or end so that you can compare the content, formatting, etc. The easy way to do this is by splitting the Window.

1. From the View tab, in the Window group, choose Split


2. Your mouse pointer will now have the split (which appears as gray bar with a double arrow), attached to it. Simply click where you want to split the Window into two, generally somewhere near the middle. You can move the split later if you wish!


3. The Window will now be divided into two separate panes, each having individual scroll bars and zoom settings!


You can move the split by clicking and dragging it with your mouse, or double click the split to remove it.

OK - Now that you are convinced this is a useful view, here is the shortcut!

Thursday, May 24, 2012

Closed without saving?? Never fear!


Did you ever accidentally close a document that you had worked on for a while and clicked “no” when prompted to save changes? Good news! The applications in the Microsoft Office 2010 suite have the ability to recover these documents. Instead of gnashing your teeth, try this!

First, make sure that AutoRecover is turned on!

  1.  In the backstage view (File tab), click Options. In the Save category, make sure that the check box for Save AutoRecover information every xx minutes is selected.
Note: This must be enabled separately for each application (Word, Excel, PowerPoint)!


     2.  Test it! When you close a document, you should see the following warning:
           “Do you want to save changes…?
            If you click “Don’t Save”, a recent copy of this file will be temporarily available.”


Recover an unsaved document:
  1. Open the backstage view (File tab).
  2.  From the Info category, click Manage Versions. The Recover Unsaved Documents button will appear.

          Alternately, choose Recent from the backstage menu. 
          Near the bottom of the window, click the Recover Unsaved Documents button!


      3.     Open the unsaved document from the UnsavedFiles folder.


      4.       When the document reopens, don’t forget to save it properly!
             You can thank me later :-)