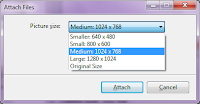
- Select one or more picture files in an Explorer window.
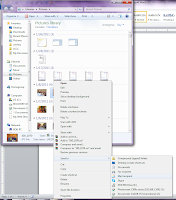
- Right click on a file name and choose Send to/ Mail recipient from the menu. The Attach Files dialog box will appear.
- Choose Smaller, Small, Medium (the default 1024x768), Large, or Original Size.
- Click the Attach button and a new message will be created with the images attached and sized as you have selected.
Search This Blog
Wednesday, January 26, 2011
Downsize a picture attachment using Windows 7 and Microsoft Outlook
This is a great option for Windows 7 users:
Downsize a picture attachment in Outlook 2010
After you have attached an image to a message in Outlook 2010, click the File tab. The backstage view of the message window will open in the Info category. Choose the option at the top to "Resize large images when I send this message." Images will be a reduced to a maximum of 1024x768 pixels, which must be done on a per-message basis. Click the File tab again to return to the message window.
Downsize a picture attachment in Outlook 2007
If you email photos using Microsoft Outlook 2007, you might like a quick and easy way to "shrink" the file size.
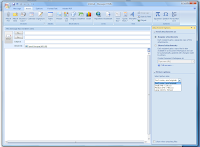
After you attach a photo, click the Insert tab on the ribbon, and then click the dialog box launcher in the bottom right corner of the Include tool group. The Attachment Options task pane will open on the right side of the message window.
Notice the Picture Options area in the bottom half of the pane: click the drop down arrow and choose to resize your picture to Small, Medium, or Large size. You might want to click the check box at the bottom of the pane to automatically "Show when attaching files."
Monday, January 17, 2011
Get a jump on your files using Windows7 jump lists
In Windows 7, jump lists are a list of the files you have opened recently
from an application. These appear on the Start menu when you point at the
application. Click on the file name and the file will open.
from an application. These appear on the Start menu when you point at the
application. Click on the file name and the file will open.
But wait... there's more! If you have a file you want to have quick access to,
"pin" it to the list. Slide your mouse over the file name, and then click on the pushpin you see to the right of the name. The file will now appear at the top of the recent list. If you need to remove a file name from the list, just click the push pin again to "un-pin" it.
Tuesday, January 4, 2011
Is opening the Task Manager for Windows a task?
A great keyboard shortcut to remember:
CTRL+SHIFT+ESC: Opens Windows Task Manager
Wow - that was fast!
Subscribe to:
Posts (Atom)