Search This Blog

Showing posts with label excel. Show all posts

Thursday, December 22, 2011

Create your own custom AutoFill list in Excel 2007 or 2010

Do you need to type the same list of departments, names, regions, etc. over and over again in Excel? Create a custom list and use AutoFill to do the job!

Excel 2007
1. Click the round Microsoft Office button in the top left corner of the Excel Window.
2. Click the Excel Options button at the bottom of the menu. The Excel Options dialog box will open.
3. In the Popular group, click the button to Edit Custom Lists

4. In the Custom List dialog box, NEW LIST is already selected. Type the list entries you would like, touching ENTER after each entry.

5. When you are done typing the list items, click the Add button. Your new Custom List will appear below the built-in lists.

6. Click OK to close the Custom Lists dialog box and return to the Excel Options dialog box.
7. Click OK to close the Options dialog box.
8. Try it out! Type a list entry into a cell. Select the AutoFill handle in the bottom right corner of the cell. The mouse pointer will change to a skinny plus sign (+); click and drag down or over to complete the list.

Note: Although you cannot change or delete the built-in Custom Lists, you can delete any list you create or add other lists at any time.

Excel 2010
1. Click the File tab in the top left corner of the Excel Window to enter the Backstage view.
2. Click the Excel Options button near the bottom of the menu. The Excel Options dialog box will open.
3. In the Advanced group, click the button to Edit Custom Lists

4. In the Custom List dialog box, NEW LIST is already selected. Type the list entries you would like, touching ENTER after each entry.

5. When you are done typing the list items, click the Add button. Your new Custom List will appear below the built-in lists.

6. Click OK to close the Custom Lists dialog box and return to the Excel Options dialog box.
7. Click OK to close the Options dialog box.
8. Try it out! Type a list entry into a cell. Select the AutoFill handle in the bottom right corner of the cell. The mouse pointer will change to a skinny plus sign (+); click and drag down or over to complete the list.


Note: Although you cannot change or delete the built-in Custom Lists, you can delete any list you create or add other lists at any time.

Tuesday, March 8, 2011

Excel: Right the wrong range!

When you begin a function, sometimes Excel does not automatically select the appropriate range of cells, as in the example below. The moving border indicates the range of cells included in the selection.

  
In this case, the range selected includes the Team Total in cell B15, which should not be included in the results when trying to calculate the average!

How to quickly fix it?? If you have not already completed the function, using your mouse, click and drag to select the appropriate cells. A moving border will indicate the newly selected range. Touch the Enter key to complete the function and view your answer!


But what if you have already completed the function before you notice the error?

 
Click into the formula bar next to the function. This will show a solid blue border that indicates the range of cells included in the result.


The range can be adjusted by using your mouse. Hover over any corner of the range box to find the sizing handle which appears as a double headed arrow (). Now click and drag to adjust the range border and correct the selection.
By the way, if you see a 4 way arrow, you will be moving the selection box instead of re-sizing. This also comes in handy at times! 
Touch the Enter key to complete the function and see your adjusted (and hopefully correct) result!


When editing any formula or function, if you run into trouble selecting the appropriate range, use the Esc key to avoid reference errors and start over. Keep in mind when working in Excel: just because you get an answer doesn't always mean it is the correct answer. Examine the results to be sure!


Friday, February 11, 2011

Excel: Use AutoCalculate to get a quick total!


Do you need a total in a hurry but don’t want to bother with a function? Click and drag to select (highlight) the cells you wish to include in the total. Look at the status bar (bottom Window frame) to see the Sum, Average, Count, etc.
 

If the cells are not adjacent to one another, hold down the CTRL key while you select the cells.


Need other functions instead? Right click on the status bar to see a menu of other commands available.


Thursday, December 9, 2010

Quickly copy a formula in Excel

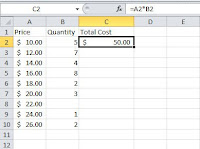
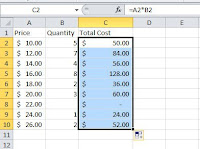
You probably already know that you can copy a formula down or across by "dragging" the small plus sign (fill handle) in the bottom right corner of a cell, which is especially useful when working with formulas. If the data covers more than just a few cells, this can be tedious. Instead, double click on the fill handle.

Wow - that was fast!